Device authorization flow with TxServer and TEOS Authentication service
To utilize the full power of the TEOS platform mobile applications should utilize the Device API of the TXServer. It provides useful services, like push notifications to all connected user devices.
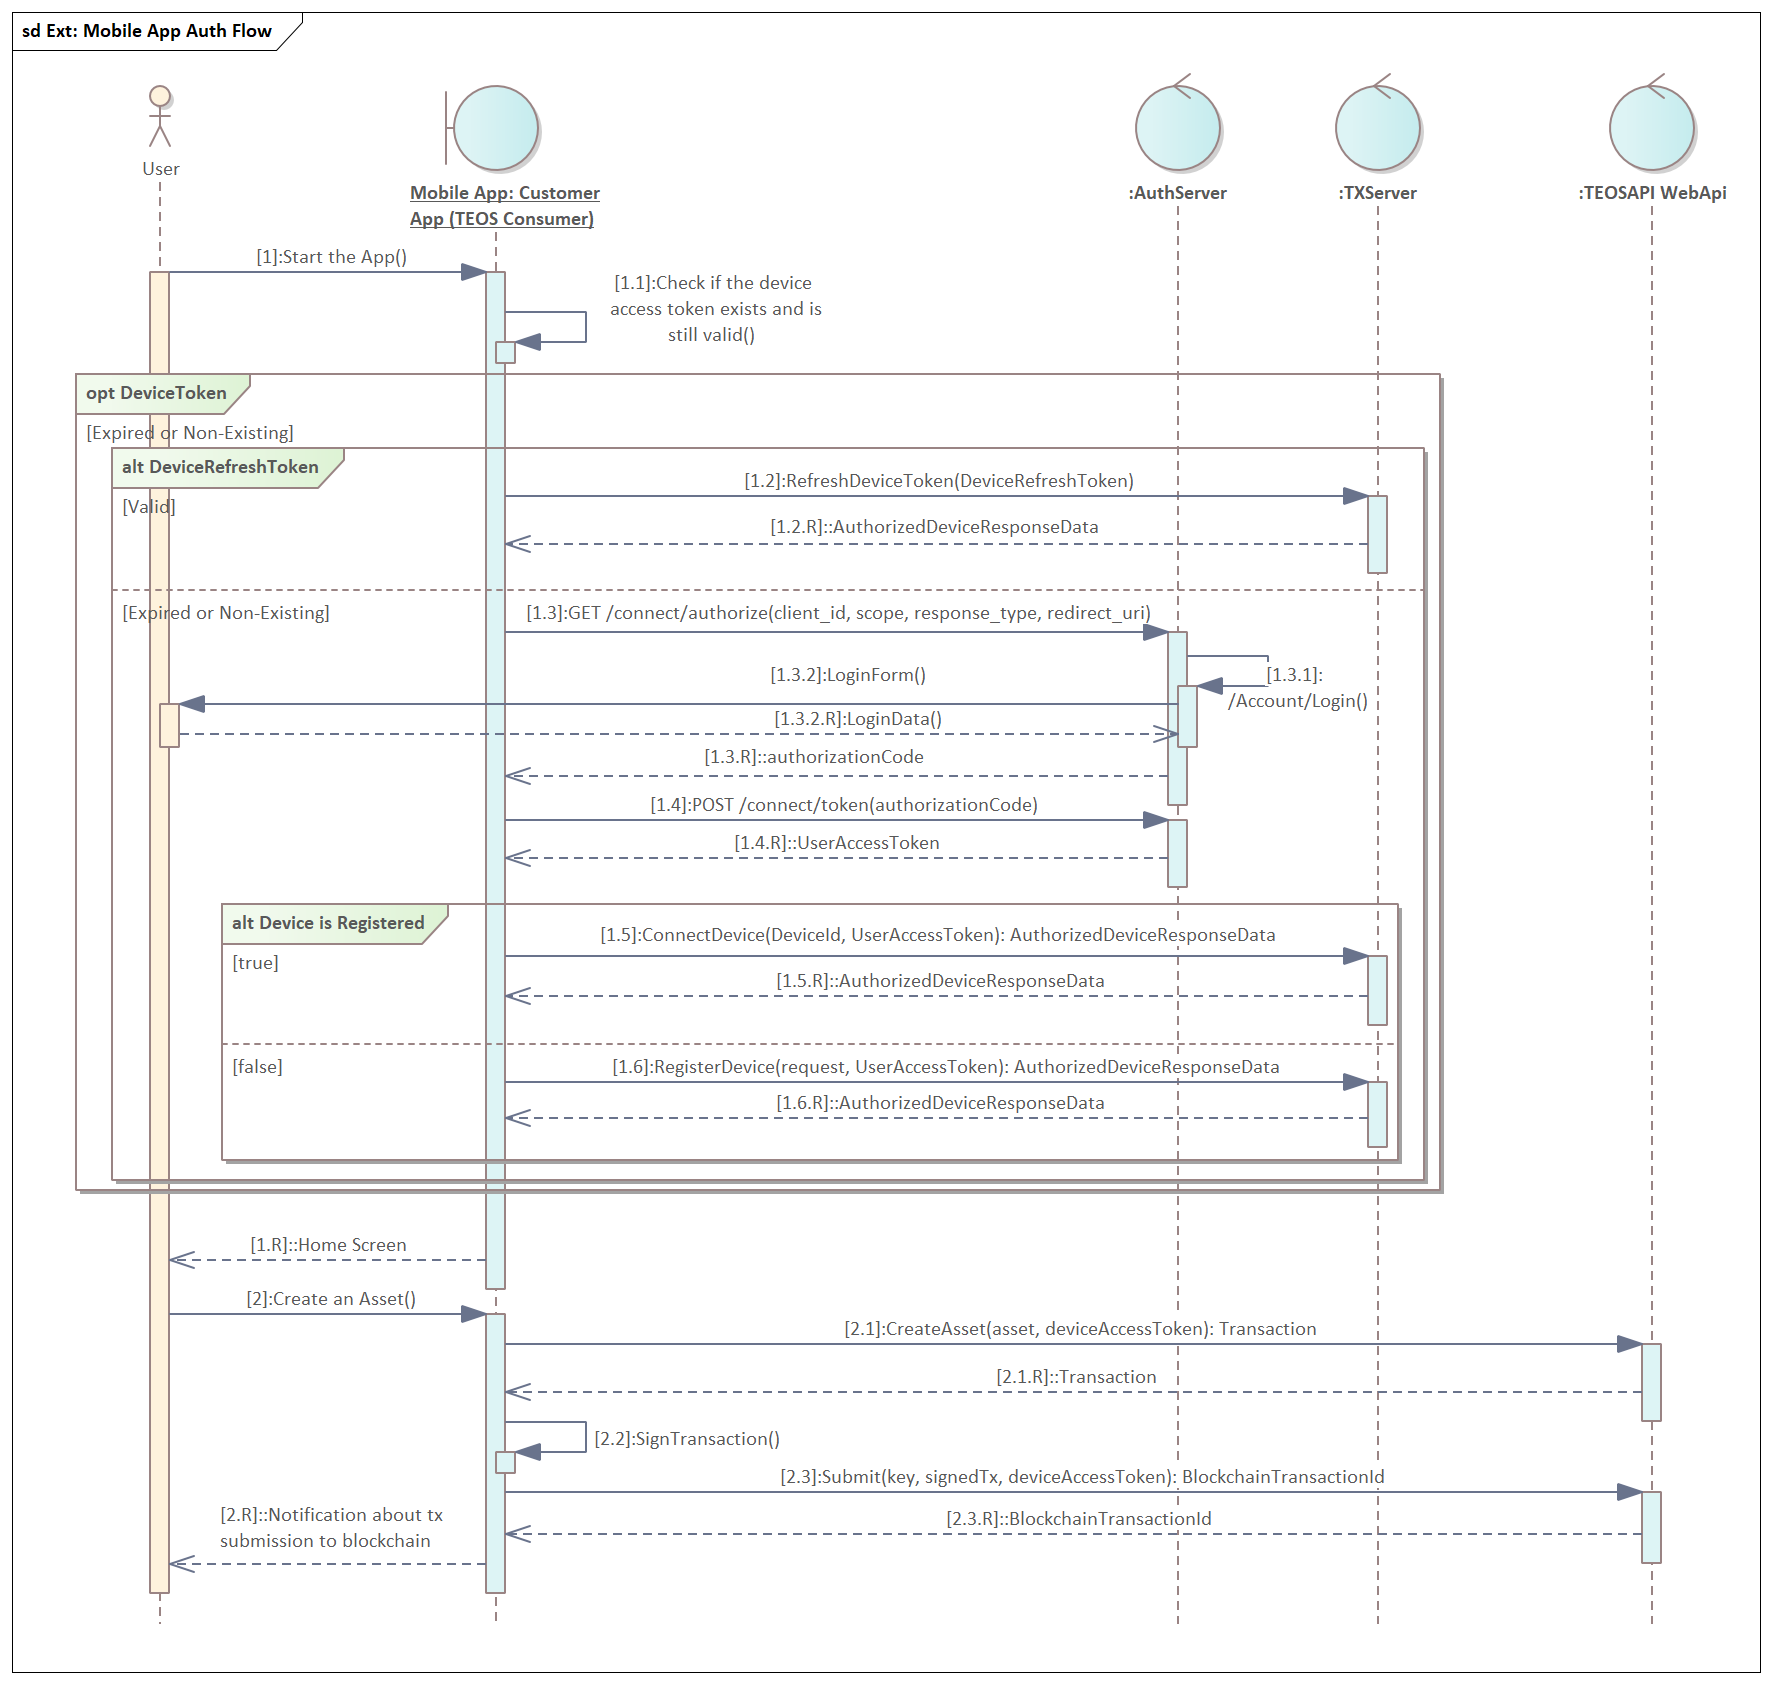
The whole process consists of the following steps (See Diagram 1.)
The [..] constraint notation on the diagram was used to number the steps. The numbering approach is similar to the communication diagram.
Step 1. A User starts the application
Step 1.1. Application checks that the device token (special type of reference (access) token) is valid (present and not expired) (exact implementation is application-specific and is out of the scope of this document).
If the device token is not valid, the application should authenticate the user and retrieve a new device token from the TXServer (steps 1.2 - 1.6)
Optional process. Retrieve a new device token. Connect or register the device
Step 1.2. If the device refresh token is still valid, it must be used to refresh the device token. TxServer function RefreshDeviceToken should be utilized for that.
Step 1.2.R. Returned AuthorizedDeviceResponseData contains the device access token, device refresh token, and the expiration in seconds for the device token.
The refresh token returned from the call to the RefreshDeviceToken endpoint can be different, from the one, that was sent. In this case, it should be used for the next call to the refresh endpoint
If both device access and refresh tokens are expired, then it is necessary to connect or register the device. To do this, user authentication, using authorization_code flow is necessary.
Step 1.3. The user authentication process should be started from the call to Authorize endpoint of the Auth server.
Step 1.3.1. If the validation of the calling application and all parameters to the Authorize request is successful, the Auth server will return the login form, configured according to the white-labelled settings of the calling application.
Step 1.3.2. The application should present the returned login form to the user in the browser pop-up window
Step 1.3.2.R. The user provides login and password or uses another federated login method (e.g. Facebook or Google)
Step 1.3.R. Auth server authenticates the user and in case of success, redirects the browser back to the app (to the redirect URL, provided in Step 2.0) with the requested authorization code
Step 1.4. The application calls Token endpoint of Auth server with the 'authorization_code' grant type and the code, acquired in Step 1.3.R.
Step 1.4.R. Auth server checks all the provided parameters and returns the requested user access token, refresh token and ID token (if configured)
Step 1.5. If the device was already registered previously, the ConnectDevice endpoint should be called, using the user access token, acquired in Step 1.4.R.
Step 1.5.R. Same data is returned as in Step 1.2.R
Step. 1.6. In case, the device was never registered, it must be registered, before connecting to any TeosAPI. For this, the endpoint RegisterDevice must be used.
Step 1.6.R. Same data is returned as in Step 1.2.R
Step 1.R. When the device token is acquired the app is ready to operate with the Teos platform
Step 2. For example, the user initiates an asset creation function in the app
Step 2.1. The app calls the respective TeosApi endpoint and the returned data contains the encoded transaction parameters, enough for signing.
Step 2.2. App signs the transaction. There are libraries for most languages available
Step 2.3. The app sends the signed transaction to the Submit endpoint of the TeosAPI.
Step 2.3.R. Http 202 Accepted is returned, if the signed transaction was accepted for submission
Was this helpful?